Pages

Showing posts with label sewing. Show all posts

Thursday, November 1


Hello strangers! Sorry I've been out of touch for so long. It's been part lack of internet (still waiting to be connected!) and part business. I moved to London about a month and a half ago now, and I've started my postgrad course which is BUSY (but fun luckily, though I am mourning not having a student lifestyle!), so between that and illness and the passing away of one pet rat, I've not been about as much.

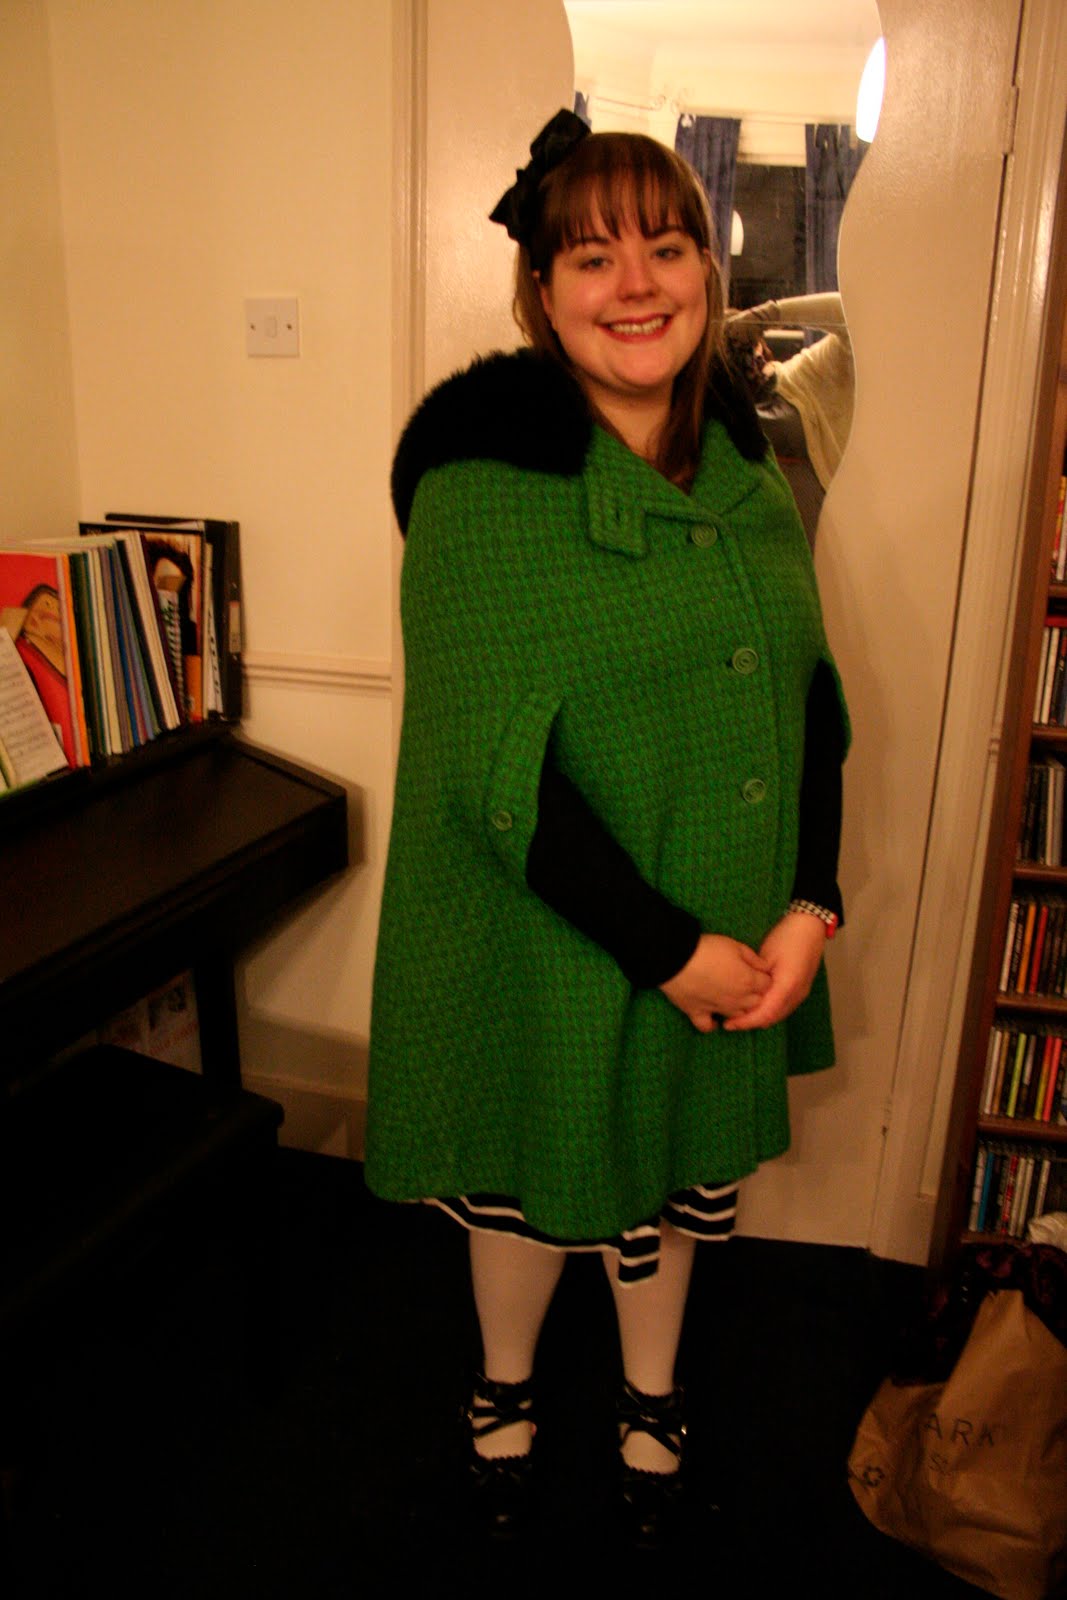
ANYWAY, I made this dress recently (with good old vintage vogue V8615, which apparently I love way too much given the amount of times I've made it!). It was a practical make, in a nice thick black ponte knit, which is a bastard to sew with but thankfully worth the trouble.

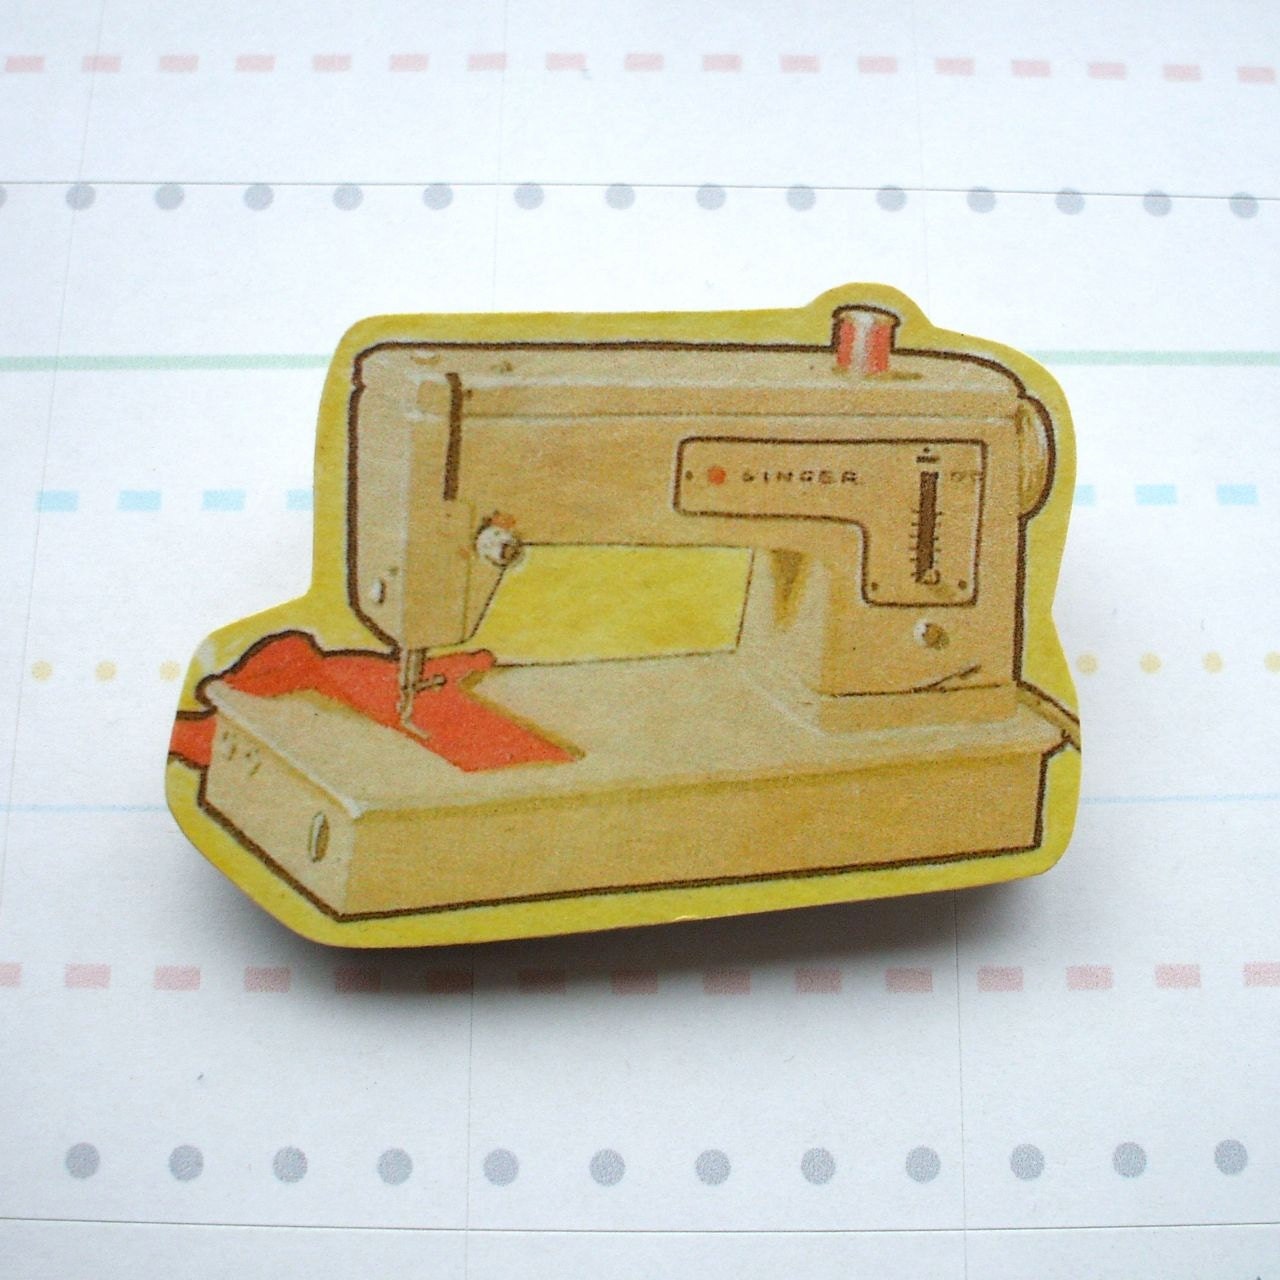
Teamed with a brooch my lovely boyfriend got me for my birthday from etsy:


It can be bought here (along with other seriously beautiful wooden delights!).

Outfit details:
Dress, handmade with vogue V8615
Shirt, actually another dress, Primark, passed on by a friend
Brooch, £7, etsy
Shoes, George, £4
Tights, M&S

Other stuff that's happened since I last posted: I had my tattoo finished! Hurray! Here it is in it's final glory. I love it!


I'm off to Leeds this weekend to sell some zines at Leeds Zine Fair, which is happening at Wharf Chambers on Sunday 4th November. It's going to be exciting, and I'm looking forward to seeing Yorkshire friends again. If you want to come, check out the facebook event here. I'm debuting a new zine which will appear online sometime next week! It's all about hard femme politics and embodiment.

xx

Tuesday, May 1


One top, worn two ways today. I bought this short sleeved knit top in the Next sale earlier this year, but haven't worn it nearly enough yet. I decided the completion of my first pair of 40s-esque high waisted trousers warranted it's reappearance, as the style is quite 40s in itself. Teamed simply both times, the top to see some friends and the bottom outfit for a work related appointment.

The trousers worked out well, though I had to remake a waistband as I used stretchy tailoring and it meant the pattern's waistband (with interfacing) was too small. I think I might enlarge the waistband next time too, as though this is high waisted, they could suit a little higher. I made them out of a suiting from my bargain hunting adventures - bought from my favourite fabric stall for £1 a metre (seriously, I wish I'd bought all they had now, it's great!), and I still have some spare to make a pencil skirt out of. Now I've made them once, I'm already planning another pair in a more adventurous colour/fabric.

Top, £12, Next sale
Skirt, handmade
Trousers, handmade from Simplicity 3688 (widely available up to a 28w, I bought mine for £4 at a sale at a local craft shop)
Loafers, Primark, £12
Black belt, Dorothy Perkins, £7

Oh! And as a side note, I am applying for funding for my etsy shop through the Fund 101 scheme on Enterprise Nation. I need 500 votes, and then I'll qualify for a £500 grant, which will allow me to expand on my current skirt and fabric selection and buy a mannequin to fit and display my wares on. You can see my page here, and it only takes a minute to vote for me. I'd reach my target if about half of my regular readers voted, so if you have a spare moment and want to see more of my wares then please do vote!

Wednesday, April 18

I'm a great believer of images as an important part of body acceptance. They're often what you base your self-hatred on beforehand, by deconstructing your appearance, and, for me at least, seeing images of fat bodies on fatshion blogs and communities showed me that my body was not worth that self-hatred. We aren't often exposed to photographs of fat people in any other guise than the headless fatty or in generally a negative or incomplete portrayal, and this lack of images to relate to makes you feel as if your body is an anomoly. Fat positive online spaces contradict this by reclaiming their own image and sharing it on their own terms, with their own chosen aesthetic and presentation.

So, for me, seeing my body (whether by writing this blog, or hanging out with other fat people, or by being visible on my own terms) has become a really empowering way of negotiating my own relationship with my body. Maybe this makes me vain as hell, but it also makes me happy, and that's more important ultimately.

Anyway, to get to the point I'm trying to make(!), I recently got a copy of The Colette Sewing Handbook by Colette Patterns. They're an ace company who make vintage inspired patterns which have always hit the spot for me. They only go up to a UK size 20, but I've often been able to make the patterns work for me by working with smaller seam allowances. I would LOVE it if they'd expand their sizing so that more plus sizers could enjoy their work too *hint hint*. In the book, the author suggests that it's a good idea to make your own sewing doll/dummy on which to base your sketches for future craft projects. You do this by photographing yourself in either tight clothing or your underwear, printing a copy out, tracing your outline and then scanning or rephotographing it again. You've then got a digital copy of yourself that you can doodle ideas for, photocopy endlessly and design clothes for.

This excited me endlessly, because A) I'm a pretty bad artist and tracing is easy, and B) it meant I could doodle ideas for future creations on a copy of my own body. This is fantastic for craft purposes, but it's also a pretty fun thing to do in general - I found it a positive experience that helped me reconnect with myself after generally feeling a bit low. You can use the form to play around with outfit ideas, make zines, plan projects, or just doodle. It's a little thing, but I found it an affirming body positive experience, so thought I'd reflect upon it.

Here's mine (and if you don't want to see drawings of me in my pants, you should probably look away now!):


BACK FAT!

And here's some stuff I'd like to make or own:

An unashamed rip off of a Queen of Holloway dress I've had my eye on. Hopeful future project!

40s esque high waisted trousers (a current project), and a nice fitting blouse with a Peter Pan collar.

Saturday, March 31

Some online crafting tips

The internet really is a fantastic resource for craft tutorials and tips. I continue to be amazed by how easy it is to become a largely self-taught crafter, and to find resources which are (by large) free. I've been expanding my skirt drafting skills a lot recently, in the interests of being able to widen the styles I can offer on my etsy shop, and I've found quite a few drafting guides that are relevant whether you are a size 0 or 34. I don't buy many patterns these days - I largely adapt the ones I have, and spend my time researching how to drafting my own instead, as it's much more cost effective in the long run.

Here are a few size-less drafting guides for skirts. Skirts (in my opinion) are easiest to start with, as with full styles (circle, a-line, pleated), you only really have to fit around the waistband.

How to draft an a-line skirt from your measurements.
How to draft a circle skirt (with bonus spreadsheet for all the tough calculations!

DIY Couture (I have their cape and pleated skirt books, and cannot recommend them enough. Easy to follow, sizeless, amazing!)

How to draft a pencil skirt.
Super cute curved pockets - a fantastic 50s-esque detail to add!

DIY bodice sloper (my next project!)

As a DIY seamstress, I find the resources available online incredibly inspiring. I rarely have to consult the craft books I own anymore - googling tutorials tends to be much simpler and easier to follow (I am not great at following written instructions, so step by step pictures, videos and so on make much more sense to me). I also find I am significantly less reliant on the patterns available for plus sizes (pretty appalling all round), and more capable of making exactly what I want to own this way.

Saturday, March 17


Another plug for you all today, SORRY. Everyone knows that I've been making clothes for a while now, and this past month I've been spending a lot of time getting my grading skills up to a good standard. I've made the decision to start selling custom made circle skirts (half and full, in a variety of printed cotton fabrics) on etsy.

I cater to any size for the prices listed, and there are other pattern options available (including some super cute bird prints!). If you're looking for a plain cotton, or perhaps a different pattern, you can also convo me and I'll see if I can source something for you (though this might incur extra costs).

There are currently four listings on Etsy - two custom listings and two ready to ship (the above two skirts, which are both best for a 20/22). Head over to my etsy shop for further details.

Wednesday, May 4

Tutorial: Pleated skirts!

After my last post featuring my most recent remade skirt, I had some interest from others in a tutorial for the skirt. Whilst I didn't take enough details to make an in depth tutorial for the skirt, I thought I would nonetheless share those I had, and give a few tips about remaking items on a budget.

This skirt began life as a £1 skirt I found in a local charity shop. Here's the original skirt:
It had a fitted waist (far too small for me!), but a very very full skirt, and enough length for me to be able to construct another skirt after chopped the waistband off the original. This particularly skirt had a button up front and pockets, both of which I sewed up before starting. If you're just starting off remaking an item, I wouldn't recommend starting with a skirt with pockets or a pocket up front - instead just look for a long-ish skirt with a waist that can easily be removed, and a very full skirt (I find old granny skirts with gathered or pleated waists to be good for this, and they're always on a £1 rail!).

I make my skirts using this tutorial, originally penned by DIY Couture (who publish an amazing series of books, without sized patterns - check them out!). Before I go on, please do have a look through this guide for a more detailed guide to planning the size of your pleats and waistband pieces. For reference, I tend to use either six or eight pleats on either side of my skirts.

Begin by cutting the waistband off the original skirt:

You then need to cut a portion off to use for your waistband at a later point. You can be approximate about this, but remember that you will need to fold the fabric for the waistband over twice (as per the DIY Couture book) and allow a seam allowance of about 3cm.

Here was my waistband piece, and what would become the main body of my skirt.

You will now need to cut the fabric for the main body in half - do this by unpicking the seams from the sides of the original skirt, or by cutting them out neatly, so you end up with two rectangles of (approximately!) the same size.


Do the same with the waistband pieces, and then cut them down to two thin rectangles which both equal (in length) half your waist measurement plus about 3cm for seams. Width-wise, they will need to be double the measurement of your intended waistband width, again with a small seam allowance. Again, please refer to the DIY couture book for a slightly more articulate explanation of how to measure how wide and long your waistband. Sorry I don't have a picture of the waist band, but you'll need to set them aside for the moment anyway.

Creating pleats! Do this on both rectangles by marking the centre of the fabric and creating small folds on either side of this centre point. DIY couture recommends calculating the size of your pleats, but I found when working with skirts that I could approximate this process by creating pleats, measuring and adjusting where necessary, until I reached the desired measurement (this will be the same as your waistband). Create a pleat by making a vertical fold in the top of the fabric, and pinning, as shown. Eventually it looks like this:

Then, you'll need to sew, with a line of straight stitch, along the top of the skirt, fixing these pleats into place. Do this with both rectangles.

Now, take your waistband pieces again, and fold them in half, with the right side of the fabric showing. Like this:

Take the waistband, and pin it to the right side of your skirt body pieces, with the raw edges facing up. Like this:

With both waistbands pinned to the skirt body, now run another line of straight stitch along the length of the waistband - this will secure the waistband into place. Flip the waistband up at this point, and you will have the front and back of your skirt! Huzzah!

I stopped taking pictures at this point (d'oh!), but basically what happens next is as follows:
  • With the right sides of both pieces facing towards each other (and the wrong sides facing outwards), tack together one of the sides of the skirt. You can run a line of straight stitch up this side, from top to bottom including the waistband to fix this into place.
  • Pin the second side together in a similar fashion, but with a slight difference. If you want to fit a zip here, you will need to place your zip along by the waistband. Mark the point at which the zip ends, and pin the fabric together below this point (so you still have an unfinished seam for the space of the zip), and then as before, run another line of straight stitch up to this point.
  • FITTING ZIPS. I'm quite rubbish at this (it's not hard, just fiddly, and it takes patience that I generally lack, haha), so I'm not even going to try and explain it. It is covered in the DIY Couture PDF, and there are also numerous youtube tutorials which can help.
  • At this point, having fitted the zip, you will have you skirt *almost* finished. At this stage, try on the skirt, making sure that it fits okay and that you don't need to take the waistband in any further. Once you've confirmed this, you'll just need to hem the skirt - simply done by turning the raw edging of the skirt from right to wrong side, then pinning into place and running a simple line of straight stitch into place.
  • Wear your skirt!

I hope that all makes sense! Please do check the DIY couture booklet, as it explains things in a slightly less muddled fashion and should answer any questions you have. I just wanted to frame this within how to remake a skirt, which is so so much cheap than buying fabric from a shop, and also a skill which I find is super handy to know as a fatty working on a budget. This skirt cost me £2.30 (plus some thread, which I took from my stash) to make, including the original skirt and a zip, so it was very cost effective!

Saturday, February 12

Dressing down the dress! Firstly, please excuse me er, pursing(?!) my lips in this picture, I appear to have been a very angry person that morning. Oh dear.

This is how I plan to wear the dress I made in a more casual style - paired with a button up blouse beneath, and my staple docs. I am in love with making my own more formal workwear at the minute (my list of sewing projects grows a bit too quickly perhaps!) - it's great to have items of tailoring that can work during the day that aren't just generic black trousers.

Dress, handmade (from a £4 piece of fabric and reusing an old pattern)
Belt, old vintage stock, £free
Badge, traded with the lovely Donna (who makes the most beautiful purses, photo frames and hair ties ever, seriously!) over on ThriftstoreUK. It has a lion on it!
Tights, M&S
Docs, gifted

Wednesday, February 9


Here's Monday morning for you! I scored this plaid shirt from a junk stall at the open market in Brighton two weekends ago. I seemed to have endless trouble finding button up blouses that actually button up to the collar last year, yet recently I've thrifted two for a pittance! This makes me happy. I get the feeling that button up shirts with this belt, loafers and the Beth Ditto jeans will become my work uniform for spring (I work as a technician in an archive, and my working day generally involves lots of dust and heavy lifting, something my wardrobe is not used to!)

Plaid shirt, found at Brighton Open Market, 50p
Jeans, Beth Ditto for Evans, £8
Belt, old vintage stock, £free
Loafers, vintage, £5

Also:
This week has been awesome - after making the polka dot dress for Plus London after work for the best part of two weeks, I needed a good few nights sleep. So evenings have been mainly watching trashy TV, cooking and plotting new projects. I scored this vintage pattern (in a size 26!) on eBay for £5, and I still have the 60s polyester I bought at the marina car boot sale in January, so I'm hoping to tackle it over the next few weeks. Scary exciting! It's a bit harder than the last two dresses I've made, so fingers crossed it still works out. Eep!

Monday, February 7

So onto the evening fun at Plus London! The evening do over at the Strand Gallery involved lots of champagne, cupcakes, and samples from Anna Scholz, Torrid, ASOS Curve and Yours Clothing amongst others (though I was useless and didn't really take many pictures of the clothes). There was also a pop up studio where my friend Caroline and I had some photographs taken (and I pulled my awkward camera horror face for a professional audience).


Annnnnnd, my sewing project in it's completed state! This was a close call, and only got finished on Thursday evening. It's a rehash of the same pattern I used in the summer to make this dress, by Very Easy Vogue (the number is V8615). With this dress I adapted this neckline to make it a round high neckline instead of a bateau as per the original pattern. My drafting didn't quite work, so I ended up pleated the (slightly baggy) neckline and crafting a bow to take onto it, which in hindsight worked pretty well!

I was terrified that a seam would break on the night or something, but it held up really well! Also, the fabric I used seems pretty crease-proof, so definitely suited for my wardrobe and er, lack of ironing skills. I'll definitely be dressing it down later this week. It was great to flounce about in my petticoat again though.


Dress, handmade using a £4 piece of material from the open market in Brighton (the pattern cost me £8 last summer).
Belt, former vintage stock, £free
Petticoat, Vivien of Holloway, £60
Cardigan, gifted by my lovely friend Caroline who found it at the Big Bum Jumble last August.
Tights, £3, Dorothy Perkins
Shoes, £8 Priceless

And also, Caroline's outfit, which I thought was super cute!

All in all, a lovely day, and it was great to get to meet so many amazing bloggers!

Wednesday, February 2

Sewing on a Budget

Sorry for my lack of posting this week! I am super busy, making a dress for the Plus London meet. Also my house hunting has been going badly (we lost out on three houses in a row, and now we’re easing off a bit, to avoid further disappointments), so I’m a bit glum.


As most of you probably know, I am a burgeoning crafter. By that, I mean that for many years I have attempted crafts of sorts. I am a average knitter, a failed crocheter, and I’m interested in embroidery and quilting (though as they are both time consuming hobbies, I haven’t really attempted any yet). As far as crafting goes, I’m not amazing - I work a full time job that sees me out of the house for 11 hours a day, five days a week, and I’m also juggling a long distance relationship, a semi-”band” of sorts and - oh yeah - blogging! So most of the time, I’m lucky to have an hour or two to myself a day, and quite frankly, I don’t have the time to build up epic skills.


Sewing is my favourite hobby, and it’s also the most cost-effective. I’m a bargain hunter in all other aspects, so I don’t believe that crafting should cost you the earth, though it can very easily do so. I’ve yet to pay more than £3 per metre for a fabric, and I can generally craft something which, if I bought, I’d pay lots for (if I could!).


My favourite things to make clothes out of include:

  • Second hand sheets, curtains, duvets. These are great sources of cheap heavy cottons in large quantities, and generally won’t set you back much more than £4 maximum.
  • Vintage fabrics, where available and affordable. I buy these from car boot sales mainly, occasionally shops.
  • Other items of clothing (I have made quite a few granny skirts into pleated skirts with fitted waists. These are cheap and easy to find in charity shops, and are often on the £1 rail!)


For modern fabrics, I also find eBay to be a great resource. Whilst not super cheap, I often pay less on eBay for fabric by the metre than I do in haberdashery shops. Etsy also has fabric options, though I don’t find them particularly cheap.


Patterns are pretty tricky to find in plus sizes, so in these cases, learning to enlarge patterns is your best bet. There are often boxes of patterns in car boot and antiques sales, these are also often to be found on etsy and eBay, so finding patterns for reasonable prices isn't too hard. My skills aren’t quite up to enlarging patterns yet, but I reckon this is the best route to go. Some swift googling just brought me to this, which looks like a reasonable and easy technique to size up vintage patterns, which I am definitely trying next. I’ve also been recommended this book as a resource, though I haven’t bought it yet so am curious to know if it’s as valuable a resource as I’ve been led to believe?


I also recommend searching for online tutorials, using the internet to self-tutor myself in the techniques of garment construction itself. Sometimes what you are looking for is easier to make than you imagine! Also, try inspecting items of clothing you already own, or in high street stores - I made my first skirt by sketching around the outline of a skirt I already owned, then stitching the sides and hems with a simple straight stitch. Start to think about how clothing is made, even if it’s beyond your immediate capabilities, it allows you to better understand what a project requires. I’ve made dresses out of stretchy fabrics with a similar approach (but sketching around a body con dress instead).


With my projects, I try not to expect perfection straight away. My projects started with fairly basic objects - cushion covers and a-line skirts without zips, now I’m competent sewing from patterns and making a relatively tailored dress. With each project I try to advance my skills slightly - in my latest project, I fitted a concealed zip for the first time, and adapted a neckline. It went as well as could be expected (though certainly not professional quality) apart from the neckline, which I ended up having to pleat slightly. Because I spend little on fabrics, I can also afford to make mistakes (though it is always a disappointment!).


As a last note, if you’re just starting out, don’t buy a new sewing machine!Depending on where you live, it’s worth checking whether there are any local resources that allow free use of sewing machines, or allow you to rent one by the hour. I remember Remade in Leeds used to do this, and it was a great way to get a sense of whether sewing was “for you” or not. Personally, I would recommend starting with an older model with a hand crank mechanism. These are everywhere in second hand shops, car boot sales, and on eBay (I got mine for £15 from a car boot), and range between £10 and £50 generally, though £20-30 is the average. These are less daunting to control as a beginner, as you are in full control of the mechanism. They only offer straight stitch, but this is generally all I use currently anyway, and they’re also incredibly durable in the long term.


Otherwise, try buying a refurbished vintage electric sewing machine. I bought mine from eBay for about £50 including postage, though if you look for electric models that haven’t been refurbished further bargains can be had.


Online resources:

DIY Couture

Burda style

Craftster.org (check out the “curvaceous” section on the community!)

Gerty’s New Blog For Better Sewing


If anyone has more, please post them in the comments!

Friday, October 1


Okay, so the less that is said about my hair today the better.

This skirt is the second pleated skirt I made out of the online pattern I posted in this entry. To make it, I bought a below knee length tartan skirt with an atrocious elasticated waist from a charity shop for £2. It's a lovely wool blend fabric so in need of being repurposed I felt! I simply cut out the waistband, unpicked the seams, and then used to fabric to make the skirt as per the pattern. It's ace! I don't think I'll ever tire of high waisted, pleated skirts.. .

I teamed this with a plain top, brown loafer heels, and a tan belt. I added a vintage scarf after taking this because I felt it lacked something.

Details:
Top, £free, clothes swap
Belt, £free, old vintage stock
Skirt, £2, repurposed old lady skirt
Heels, £15 clarks sale.

Sunday, September 5

Sewing project!

So the other day I attempted a new sewing project. I'm very new to "proper" sewing - I've had a sewing machine for years but nothing much came of it apart from lots of jammed thread and about one half decent skirt. However, earlier this year I got sent a link to this DIY couture pattern for a pleated skirt. Now I really can't recommend this pattern enough - in terms of instructions, it's easy to understand without being patronising, and results in a quality of tailoring that's hard to find in plus size shops.

More importantly, what I loved about the instruction book was that, unlike sewing patterned which are strictly sized and hard to adapt, it was size-less. You work out your own measurements, so it's a guide that really can be used by anyone with access to a sewing machine. You can pick up some fabric from a market (my local has stalls that I've gotten fabric for £1 a metre before) or buy some curtains or a duvet from a charity shop or car boot and make something which is truly lasting and well fitting from them. It's revolutionary!

The skirt I made can be seen here on my flickr stream. I had some old 60s curtains, bagged for a reasonable £2 from a charity shop, and decided to dust them off for a more public viewing.

DIY couture have a whole bunch of books available for a reasonable price, including books for capes, kaftans, dresses, jumpsuits and trousers, and when I next have pennies, I'll definitely be buying one.

Anyway, since discovering that pattern, I've made another skirt from an old tartan wool skirt bagged for £2 from a charity shop. Since both were successes I decided to spend some pennies on a proper pattern and try to make a dress. I found vintage vogue pattern V8615, from Vogue's easy range, in my local haberdashery shop, which looks like this:


The pattern only went up to a vintage 24 (which equates to about a modern UK 20), but because of my smaller boobs and the full skirt, I thought it would be possible to work with even though I'm about 5" bigger than the waist and hip measurements. I didn't enlarge the pattern, but I did work with smaller seam allowances to leave me with more fabric left. This was a bit of a haphazard approach, but I'm definitely not experienced enough to be redrafting it entirely!

The pattern consisted of 6 separate parts which were cut twice each. I decided to forego the sleeves and the pockets, as I felt the fabric I had was more suited to a sleeveless style (and the pockets were a bit unneccesary). The pattern also called for lining, but I scrapped that too. Oh, and the zip, because when I got to the point where I needed to insert one, I realised that it was easy enough to pull it over my head without needing to zip.

So here is the result:


The fabric was a pair of curtains from a charity shop, which I paid £4 for. It's a heavy duty cotton, so comfortable and sturdy. I paid about £8 for the pattern, so in total paid £12 for what is pretty much the perfect summer dress for me.

The bodice was made of four pieces from two different pieces of the pattern, and involved two darts on the front and two on the back. It was my first time working with darts, and it was challenging but ultimately definitely worthwhile, as it looks like the 50s sundress of my dreams! The skirt is a classic circle skirt, with four panels and a fitted waist. Whilst it was definitely a step up from anything I'd made before, this was definitely a lot easier than anticipated, and I'd recommend it for anyone with some basic or average sewing skills.

Yesterday evening, I dressed it up to go to see Inception at the cinema.


I've been loving the reappearance of ankle socks this year, and scored some cream and gold sparkly polka dot socks from Primark the other day, so it seemed like a good night to try it out!

Dress, handmade - cost about £12 to make including pattern
Tan belt, my old stock, £free
Ankle socks - £1 per pair, Primark
Nude brogues - £12, Primark

Friday, August 27


Some DIY action for you tonight. I've had this dress a while - it got sent to me with some vintage stock, but isn't actually vintage. It does a very good impression of being from the 40s though. It was labelled a size 14, but made of a stretchy acrylic that meant it fit me well too - however, it used to have a sort of flap front to the skirt, meaning that every time I sat down, the world saw er... much more than it needed to see. I've been meaning to sew the two flaps together and make it into a cute pencil skirt shape for a while, but never got beyond pinning it. However, tonight I decided to set on some of the sewing projects I've left about the place.

This will be the perfect winter day dress! It's got super cute leopard print buttons than you can't see, and a figure hugging shape. I teamed it with some mascara, chanel lipstick in rouge noir (which I traded online for recently), my trusty brown waist belt (which probably isn't the right colour or shape really) and some ancient peep toes from Evans.